Saturday, May 2, 2015

We're Back!

It was never our intention to take a 6-month-long hiatus, but we're just now ready to update you with our most recent and most exciting project, the fireplace wall/built-ins! Don't get me wrong, there was LOTS of progress going on this whole time, but Eric and his dad were building the built-ins in the workshop, so we didn't have a whole lot to show for it on the home front.  Here's where we left you:


The next step at this point was to take the door off, open up the space all the way to the ceiling, and then do the same thing to the left side.  It sounds so easy when I say it like that, doesn't it?  Well, Eric was the one who actually did it and he assures me it wasn't that easy (even though he made it look easy).  He had to do some re-framing to remove all of the studs you see there on the left and open up the space, which required borrowing from the closet behind this wall (in the second bedroom).  Most of the space we "borrowed" actually came from a hallway closet which we chose to sacrifice for the sake of the symmetrical built ins.  Unfortunately for you, I've gotten a new phone in these past 6 months, so I have no photo documentation of this process (I mean....I do, but I would have to get my old phone, find the charger and turn it back on to retrieve the pictures, and I'm pretty sure the pictures weren't even that good.  Sorry...).  

After that was drywall, which left us looking like this:


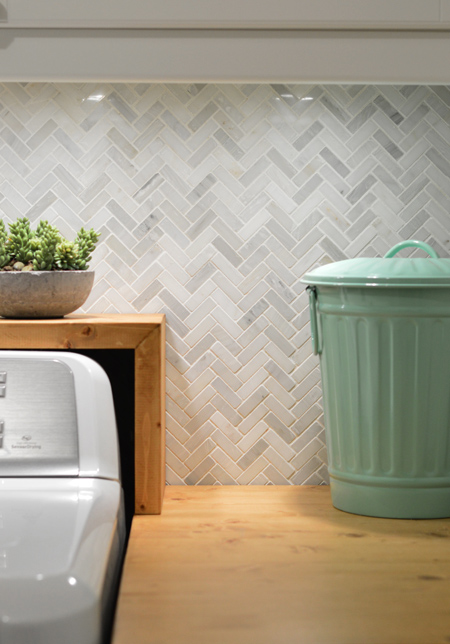
I know:  "Sally, get it together and move that stupid ladder before you take a picture."  Sorry.  Let me walk you through what you're seeing here.  On either side you'll notice two gaping holes, the future home of an enormous set of built-in shelves that Eric and his dad diligently slaved over for at least two months.  If you're interested, in the left gaping hole you can see the old door frame leading to the hallway from when that was a closet.  Around the fireplace is marble herringbone tile that Eric laid...I'll get some closeups of it once the project is complete.  Around that is new drywall, which we primed on top in preparation for paint.  We didn't prime the bottom portion because it is going to be covered up by the mantel that Eric is actually assembling at this very moment.  

That's brings us to a very exciting day indeed, which was the day Eric and his dad installed the built-ins!  They built them in two separate sections and brought them over that way:

(Top section- shelves)

(Bottom section- cabinet sans doors)

Next was to affix the top section to the bottom section:


And slide it on in there (Again, it sounds so easy, doesn't it?!):


We were so excited to finally get these babies installed but as you can see, we still have a long way to go.  While Eric has been framing the cabinet doors and building the mantel, I have been priming and painting everything white.  I'm having flashbacks to when I painted all of our kitchen cabinets by hand!  Additionally, we have a lot of trim work to polish off all of those edges and gaps.  

This project has definitely been taking up most of our time, but we have managed to squeeze in a few other updates that are worth mentioning.  First and foremost, we were on the brink of installing hardwood floors when we discovered our air conditioning wasn't working one day (Spoiler alert: We did not end up being able to install hardwood floors).  The A/C guy let us know that our 16-year-old heat pump had a leak, and because of that along with a lack of maintenance throughout it's lifespan, it needed replacing.  So here's what we got to show for a beaucoup of money...


Ok you have to admit, that's a pretty snazzy thermostat!  While we weren't exactly planning on getting a new heat pump installed, it will be a great selling feature for this house so I'm glad we did it, even if it did delay our hardwood floors slightly!  I'll leave you with an updated picture of our front porch:


Hopefully our next post won't take another 6 months!  Until then,

Sal

Tuesday, November 11, 2014

Bringing the Heat


As promised.... our vent-less gas fireplace!

We've had fireplaces on the brain ever since last winter's polar vortex and we almost froze thanks to our heat pump.  In fact, for having the word "heat" in it's name, a heat pump doesn't really produce heat at all...at least, not enough to keep up with these mountain winters.  Heat pumps are great for the spring, summer and fall, but we found it difficult to sustain our house's temperature at much higher than about 63 degrees in January and February.  In our house's defense, we do have baseboard heat, but none of them are working!  So we then had to ask ourselves the question, "Do we have the baseboard heat fixed or do we investigate alternative forms of heat production?"  

Enter gas fireplace.

After seriously considering a wood-burning stove, we settled on a vent-less gas fireplace because installation would be relatively simple and because it would conserve space in an area of our home where we desperately needed space.  To make room for the fireplace, we're borrowing from the guest bedroom closet.  Here's how it went down:

Remember this wall?  The one the TV is on?

Here's where we started Saturday afternoon.


In this picture Eric is actually in the closet of our guest bedroom.


This morning a friend from church came over and helped Eric install the fireplace, which included framing around it.


And that's how we got here!  I imagine you're thinking, "But why did you proceed to remove ALL of the drywall?"  The plan is to create built-in shelves on either side of the fireplace.  On the right it will be as simple as removing the door and molding and opening the closet up all the way to the ceiling, and on the left we will actually be sealing our hallway closet to the hallway and opening it up to the living room.  Not as simple as the closet on the right...in fact, we're still figuring out the details.  But when it's finished, we hope that it will look something like this:
Farrow&Ball (Elephant's Breath & Charlston Grey): gray walls with white trim and white shelves
Not to mention we're also putting tile around the fireplace and building a mantel to seal the deal.  Here's the tile we're planning to use:

You might recognize it from the blog Young House Love

At this point, the next step is to have the gas company come out and hook the fireplace up to a propane tank.  In the meantime, we'll be planning out the specifics of the hallway closet's makeover so that hopefully by Saturday we'll hit the ground running!  Until then!

Sal


Sunday, November 2, 2014

Kitchen Buffering...Complete!

It has been 3 1/2 months since we started painting our kitchen cabinets, and while I can't say that we are completely done, we have enough done that I feel like going ahead and sharing "after" pictures.  When I last left you, we were painting the last of the lower cabinets:


Still on the list was framing, painting, and mounting the cabinet doors.  It seemed like a daunting task, but it turns out Eric is a whiz on the chop saw!


For the framing, we just bought a sheet of plywood and Eric cut it into 2 inch strips on a table saw.  The plywood was less than $10 for the amount we got, so it was a super cheap project! 

And now for the before and after...

Before

After
                                                   

You may notice we still don't have doors on our upper-most cabinets.  Originally we wanted to make those glass, but now we've decided just to frame them like the others.  Not only did the framing make the cabinets look ah-mazing, but it was so stinkin' easy and fast, we just couldn't say no to taking the easy way out and putting a fork in this project.


We got a great deal on the cabinet pulls from Overstock.com.


Even though the cabinet pulls are stainless steel, we spray painted the hardware with brushed nickel since it was closest we could get to the actual color and look.  They don't match exactly, but who's looking that close anyway?

I love these cabinets.  This DIY project of our's turned out so much better than I ever imagined, and that's not typical for us!  Not only do I love the way they look, but I love how much money we saved by salvaging them!  I'm not sure how much it would have cost to install brand new cabinets in our kitchen, but I think a low estimate could start at $3,000 not including installation (which I would definitely have done, or else I never would have never slept again thanks to visions of my upper cabinets crashing to the ground).  So add installation to that, and I'm thinking it would have cost at least $5,000 for cabinets that aren't even solid wood (our's are).  The only materials we required for this project were 2 cans of primer and 2 cans of paint at a whopping $30 per can, something like $75 on the cabinet pulls, a can of spray paint, and a sheet of plywood, all of which comes in around $200.  By far one of the cheaper projects we've done, while making the biggest difference in the look of our home.

We're still far from done in here (wood floors, counter tops, back splash, demolishing a wall), and with the cabinets looking so fantastic, I'm really excited to do the rest.  Sometimes just to get an idea of what the final product will look like, I take our cutting board and pull it over the side of the counter and imagine what butcher block counter tops will look like...


Sigh.

But to more pressing matters, we've ordered a vent-less gas fireplace and we be installing it in the next couple weeks!  We're super excited...not only is it going to completely change the way our living room looks, but it will be nice to have some extra heat this winter.  Until then...


-Sal

Sunday, August 24, 2014

Smells Like Trouble


And no, it's not those dirty dishes in the sink.  

There was, however, a very subtle yet disturbing odor coming from the cabinet under the sink.  When we first moved in, we blamed the odor on just "mustiness" that might come from a house going uninhabited for a time.  And although it wasn't noticeable to most people, the smell didn't go away like we thought it would.  It wasn't overly apparent; you probably wouldn't smell anything if you came into our house, but when we would come home after being out of town for the weekend, there it was.

So then we renovated our bathroom, and when Eric was scraping up the floor tile, it smelled to me like a freshly tilled garden (keep in mind, this is not how normal houses are supposed to smell).


So we thought, "Aha! This rotted floor must be the source of the mustiness!"  But even when the renovation was complete, the smell smelled on.

Well, long story short (I know, too late), the smell was coming from our wood cabinets.  It became absolutely apparent when a small leak under the sink got the wood wet and-- boom!  That some old smell we were all too familiar with about knocked us over.  So we sprayed some mold killer, slapped on a few coats of stain-blocking primer and viola!  No more smell!  This is a big deal, y'all! These are results you simply can't appreciate through your computer screens, and unfortunately computerized "scratch and sniff" technology is beyond the scope of this blog.

Can we talk about that trash compactor?  Your days are numbered, buddy.


And now, seeing as it occurred to me that I've been sharing "before and after" cabinet pictures without really discussing the process, here are some "progress shots" from yesterday:


I've read a lot of "How to Paint Your Kitchen Cabinet" how-tos and all of them start out with sanding and/or de-glossing the cabinets.  Ugh, sounds like a lot of work and dust.  But when I saw written on the label of our primer paint can "No need to sand," along with the fact that these cabinets weren't treated with much finish, I just went for it.  No sanding, no de-glossing, no problem. 


Nothing says "abyss" like reaching your hand into a 43-year-old cabinet that you can't see the back of.

Painting the lower cabinets was way easier than painting the upper cabinets, so that was really encouraging because we could be done painting in just one more weekend!  Then we can start framing the cabinet doors and installing hardware.  Here's the hardware we like:

Style Selections 7-1/2-in Center-to-Center Brushed Satin Nickel Bar Cabinet Pull
Things are changing around here!  Until next time...

Sal

Sunday, August 3, 2014

Bring on the Rain

Things are moving quickly here on Briarwood Lane!  On Friday Eric took the day off so that he and a friend of our's could re-shingle our roof.  A lot of people ask me, "What is your next project going to be?" and seem interested in why we tackle things in the order that we do.  Well, we like to split our goals into three sections:  Big projects which are more expensive and/or disruptive/labor intensive, little projects that are less expensive and/or can be done little by little, and extra credit/undecided projects, which we'll tackle only once we've completed the necessary goals and then decide that we still want to do them.  The "big" goals we have for this house included new windows, full-bathroom gut job, new roof, kitchen wall demolition and installing wood floors.  Small goals include, but are not limited to things like painting, crown moulding, redecorating, landscaping, etc.  There are obviously a ton of other things that could be added to these lists, but you get the idea.

The first big goal we completed was installing new windows, which was something we decided to make a priority since our windows were in disrepair and winter was fast approaching.  The next big project was the bathroom renovation, because...let's be honest, we couldn't have gone much longer with that crumbling sub-floor.  After the bathroom a lot of people asked, "Are you going to do the kitchen next?!"  I wish! Around that time was when we noticed a little water spot on our ceiling and we knew that the roof would have to come next.  So let's take a look!  But first, a before picture...


Aww heck, let's just go back to the beginning while we're at it!


See that long area on the top left of the roof that always looks wet?  We found out that was a type of moss growing.  


I don't really have a before picture of the roof in the back of the house, but here's a progress shot of Eric and Vince on the roof:


To the left of Eric's knee you can barely see the old rusted hood vent...it looked pretty bad.

While the guys were banging around on the roof, I was in the kitchen...you guessed it, painting! 


So now all of the upper cabinets are painted...whew!  Next up, bottom cabinets! You might have noticed that I did not paint the inside of the cabinet above the sink, and the reason why is because it contains a can light.  While all of the other uppermost upper cabinets will soon have glass fronts, this cabinet's face will remain solid wood because of the can light, so I figured it didn't matter if I didn't paint the inside, plus it would have been really hard to paint around that can.  

We're feeling very thankful for all of the work we've been able to do in just ten months, especially when you consider that we've been able to check 3 major items off of our "big project" list!  And in case you were wondering, we are still not regretting having bought a fixer-upper!  

Sal


Sunday, July 27, 2014

Kitchen Buffering...


My cabinets are white!  My cabinets are white!  My cabinets-- OK that's enough.  Seriously though, this has made such a huge difference and we're thrilled!  These babies required 2 coats of primer and 2-3 coats of white paint.  It was tedious work, but just seeing the dark wood disappear with every brush/roller stroke kept me motivated.  We haven't painted the lower cabinets yet (7 hours of work in one day was enough for me) and you'll notice they don't have doors yet (the doors are painted, but we're still deciding on how to frame them), but you can't deny that we're a lot farther than where we started...

If you're really sharp you'll have noticed that we still have to re install our microwave and put all of our junk back in the cabinets.  So where is the junk now?


Anyway, there's something that I'm even more excited about than our white cabinets!  Here is a picture that was taken after we painted the cabinets and before we got a second wind:


This bear of a cabinet has been the bane of my existence ever since we moved into this house 9 months ago.  First of all, it's GIGANTIC and it makes the kitchen feel like a separate room.  Second, it's so tall and so deep that it's not practical to store anything in there.  Third, if you want to walk into the kitchen and someone is standing at the refrigerator?  Forget it.  And fourth, it stinks.  Seriously, it smells musty!  So when faced with the question, "Should I paint it?", the next question that followed was, "Well, how long is it going to be before we get rid of this thing anyway?"  And I'm sure you can guess what happened next.


Goodbye cabinet!  Hello exposed sub-floor and (more??) peach-colored ceiling?!  Whatever, I'll take it! You can see in the above picture that I'm doing a pretty good job (not) of disguising the patch of sub-floor by putting the trash can on top of it.  

Here's a different perspective:

 Before

After
Anytime I get too excited though, all I have to do is look on the other side of the kitchen...


Oh yeah, we have a long way to go! 

Sal